In the ever-evolving digital landscape, cybersecurity is paramount, and Kaspersky Internet Security stands as a stalwart defender of our digital lives. However, circumstances may arise where you need to uninstall this protective shield. Whether you’re upgrading to a new security solution or troubleshooting issues, the process should be smooth and stress-free. In this guide, we’ll walk you through the steps on how to uninstall Kaspersky Internet Security, ensuring a hassle-free experience.
Why Uninstall Kaspersky Internet Security?
Before we delve into the uninstallation process, it’s crucial to understand why you might consider parting ways with Kaspersky Internet Security. Perhaps you’ve decided to switch to a different antivirus software, or maybe you’re facing compatibility issues. Whatever the reason, a seamless uninstallation is vital to maintain the integrity of your system.
Step-by-Step Guide to Uninstalling Kaspersky Internet Security
1. Prepare Your System
Before initiating the uninstallation process, ensure that you save any open work and close all running applications. This prevents data loss and ensures a smoother uninstallation.
2. Access Control Panel
Navigate to your computer’s Control Panel. You can do this by pressing the Windows key, typing “Control Panel,” and hitting Enter. In the Control Panel, locate the “Programs” or “Programs and Features” option.
3. Locate Kaspersky Internet Security
Scroll through the list of installed programs and find Kaspersky Internet Security. Click on it to select the software.
4. Initiate Uninstallation
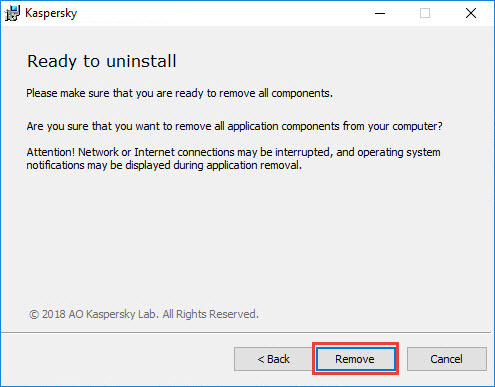
With Kaspersky Internet Security selected, click on the “Uninstall” or “Change/Uninstall” option. Follow the on-screen instructions provided by the uninstaller wizard.
5. Complete the Uninstallation Process
Allow the uninstaller to complete the process. This may take a few moments, depending on your system’s specifications.
6. Restart Your Computer
Once the uninstallation is complete, restart your computer to finalize the changes. This step ensures that any remaining components are removed, providing a clean slate for your future security solution.
Tips for a Successful Uninstallation
- Backup Your Data: Before uninstalling any security software, it’s wise to back up your important data to prevent any accidental loss during the process.
- Check for Residual Files: After uninstallation, double-check your system for any residual files related to Kaspersky Internet Security. Manually delete them to ensure a thorough cleanup.
- Install a New Security Solution: If you’re replacing Kaspersky with a different security solution, make sure to install the new software promptly to maintain continuous protection.
Conclusion
Uninstalling Kaspersky Internet Security is a straightforward process that, when done correctly, leaves your system ready for the next phase of cybersecurity. Following the outlined steps ensures that you bid farewell to Kaspersky with precision, maintaining the health and security of your digital environment. Remember to stay proactive in safeguarding your online presence, and whether you’re upgrading or making a switch, prioritize the smooth transition for uninterrupted protection.